Resilient Installation Guidelines for WPC Products
I. General Information
All instructions and recommendations should be followed for a satisfactory installation.
-
Acclimation of material prior to installation is not required; however, the floor covering should be installed in a climate-controlled environment with an ambient temperature range temperature between 55° - 85°F (13°-29°C) or average temp. of 70°F (21.1°C).
-
Post installation temperature range is between 55° - 100 °F (13°- 37.7°C).
-
· Avoid exposure to direct sunlight for prolonged periods, doing so may result in discoloration. During peak sunlight hours, the use of drapes or blinds is recommended. Excess temperature due to direct sunlight can result in thermal expansion and UV fading.
-
Install product after all other trades have completed work that could damage the flooring.
-
If cabinets are to be installed on top of the flooring (including islands), that area of material must be fully adhered to the subfloor (including an additional 2’ft (0.6m) beyond the cabinets and islands).
-
To minimize shade variation, mix and install planks from several cartons.
-
Inspect all planks for damage before installing. If you have any concerns about the product fit or finish, please see contact information provided below. Claims will not be accepted for flooring that has been cut to size and/or installed.
-
Use cementitious patching and leveling compounds that meet or exceed maximum moisture level and pH requirements. Use of gypsum-based patching and/or leveling compounds which contain Portland or high alumina cement and meet or exceed the compressive strength of 3,000 psi are acceptable.
-
For cracks or saw cuts deeper than 1"(25.4 mm), use a 2-part urethane treatment that prevents future damage from moisture penetrating to the surface of the slab that may damage or breakdown adhesives or unapproved patching compounds.
-
Installation Methods: Installation Methods: Floating / Glue Down (on, above or below grade)
-
Required perimeter expansion spacing for Floating or Glue Down installation is as follows:
For areas less than 2500 sq ft (232.2 sq m), use 1/4" (6.4mm) gap
For areas larger than 2500 sq ft (232.2 sq m), use 1/2" (12.7mm) gap
-
This flooring is waterproof and reliably secures the flooring panels on all four sides. However, excessive moisture in the subfloor could promote mold, mildew, and other moisture related issues like the trapping of moisture emissions under the flooring, which may contribute to an unhealthy indoor environment.
-
Additional layer of 6 mil poly film or equal vapor retarder with a perm rating of .1 or less may be used as an additional layer of protection.
-
Crumb rubber underlayments are not an acceptable option for use with resilient floor coverings due to performance issues resulting from chemical incompatibilities.
II. Subfloor Information
All subfloors must be clean, flat, dry and structurally sound. The correct preparation of the subfloor is a major part of a successful installation. Subfloor must be flat – 3/16" (4.7mm) in 10' (3m) or 1/8" (3.2mm) in 6' 1.8 m).
A. Wood Subfloors
Do not install material over wood subfloors that lay directly on concrete or over dimensional lumber or plywood used over concrete. Refer to ASTM F1482 for panel underlayment recommendations.
-
Do not apply sheet plastic over wood subfloors.
-
Basements and crawl spaces must be dry. Use of a 6-mil black polyethylene is required to cover 100% of the crawl space earth. Crawl space clearance from ground to underside of joist is to be no less than 18” and perimeter vent spacing should be equal to 1.5% of the total square footage of the crawl space area to provide cross ventilation. Where necessary, local regulations prevail.
-
DO NOT install over sleeper construction subfloors or wood subfloors applied directly over concrete.
-
All other subfloors - Plywood, OSB, particleboard, chipboard, wafer board, etc. - must be structurally sound and must be installed following their manufacturer’s recommendations. Local building codes may only establish minimum requirements of the flooring system and may not provide adequate rigidity and support for proper installation and performance. If needed add an additional layer of APA rated underlayment, fasten and secure according to the underlayment manufacturer’s recommendations.
-
Resilient flooring is not recommended directly over fire-retardant treated plywood or preservative treated plywood. An additional layer of APA rated 1/4" (6.4mm) thick underlayment should be installed.
B. Concrete Subfloors
NEW AND EXISTING CONCRETE SUBFLOORS SHOULD MEET THE GUIDELINES OF THE LATEST EDITION OF ACI 302 AND ASTM F 710, “STANDARD PRACTICE FOR PREPARING CONCRETE FLOORS TO RECEIVE RESILIENT FLOORING” AVAILABLE FROM THE AMERICAN SOCIETY FOR TESTING AND MATERIALS, 100 BARR HARBOR DRIVE, WEST CONSHOHOCKEN, PA 19428; 610-832-9585; HTTP://WWW.ASTM.ORG.
-
Floors shall be smooth, permanently dry, clean, and free all foreign material such as dust, wax, solvents, paint, grease, oils, and old adhesive residue. The surface must be hard and dense, and free from powder or flaking.
-
If the adhesive residue is asphalt‐based (cut‐back), or any other type of adhesive is present, it must be removed by industry accepted methods such as mechanical removal or wet scraping.
-
If a chemical abatement has been performed, remove any residual chemicals present. Use a 2-part urethane treatment to prevent future damage from moisture penetrating to the surface of the slab that may damage or breakdown adhesives or unapproved patching compounds.
-
Adhesive removal using solvents or citrus adhesive removers is not recommended. Solvent residue left in or on the subfloor may affect the new adhesive and floor covering.
WARNING! DO NOT SAND, DRY SWEEP, DRY SCRAPE, DRILL, SAW, BEAD BLAST ORMECHANICALLY CHIP OR PULVERISE EXISTING RESILIENT FLOORING, BACKING, LINING FELT, ASPHALTIC “CUT BACK” ADHESIVES OR OTHER ADHESIVES.
-
These products may contain either asbestos fibers and/or crystalline silica. Avoid creating dust. Inhalation of such dust is a cancer and respiratory tract hazard. Smoking by individuals exposed to asbestos fibers greatly increases the risk of serious bodily harm. Unless positively certain that the product is a non‐asbestos‐containing material, you must presume it contains asbestos. Regulations may require that the material be tested to determine asbestos content and may govern the removal and disposal of material. See current edition of the Resilient Floor Covering Institute (RFCI) publication Recommended Work Practices for Removal of Resilient Floor Coverings for detailed information and instructions on removing all resilient covering structures. For current information go to www.rfci.com.
-
Concrete slabs must be dry with no visible moisture.
-
Required Moisture Testing - maximum moisture level per ASTM 1869 CaCl is 8 lbs. and ASTM 2170 In-situ Relative Humidity 90% per 1000 sq.ft. in 24 hours.
-
Do not install over concrete with a history of high moisture or hydrostatic conditions. Excessive moisture in the subfloor could promote mold, mildew, and other moisture related issues like the trapping of moisture emissions under the flooring, which may contribute to an unhealthy indoor environment. Shaw Industries does not warrant nor is responsible for damage to floor covering due to moisture related issues.
-
pH level of concrete should be between 7-10.
-
The final responsibility for determining if the concrete is dry enough for installation of the flooring lies with the floor covering installer.
-
NOTE: IT MAY NOT BE THE FLOOR COVERING INSTALLER'S RESPONSIBILITY TO CONDUCT THESE TESTS. IT IS, HOWEVER, THE FLOOR COVERING INSTALLER'S RESPONSIBILITY TO MAKE SURE THESE TESTS HAVE BEEN CONDUCTED, AND THAT THE RESULTS ARE ACCEPTABLE PRIOR TO INSTALLING THE FLOOR COVERING. WHEN MOISTURE TESTS ARE CONDUCTED, IT INDICATES THE CONDITIONS ONLY AT THE TIME OF THE TEST.
LIGHTWEIGHT CONCRETE
-
All recommendations and guarantees as to the suitability and performance of lightweight concrete under resilient flooring are the responsibility of the lightweight concrete manufacturer. The installer of the lightweight product may be required to be authorized or certified by the manufacturer. Correct on-site mixing ratios and properly functioning pumping equipment are critical. To ensure proper mixture, slump testing is recommended.
-
Lightweight aggregate concretes having dry densities greater than 90 lbs. per cubic foot may be acceptable under resilient flooring.
-
Concrete slabs with heavy static and/or dynamic loads should be designed with higher strengths and densities to support such loads.
-
Surface must be permanently dry, clean, smooth, free of all dust, and structurally sound.
-
Perform Bond testing to determine compatibility of adhesive to the substrate. Surface primer (compatible with the adhesive) can be utilized to promote adhesion.
-
Three internal relative humidity tests should be conducted for areas up to 1000 SF (92.9 sq m). One additional test, for each additional 1000 SF (92.9 sq m).
Radiant Heating: Radiant-heated subfloor systems can be concrete, wood or a combination of both. The heating systems components must have a minimum of 1/2" (12.7mm) separation from the flooring product. The system must be on and operational for at least 2 weeks prior to installation to reduce residual moisture. Three days prior to installation lower the temperature to 65° F (18.3°C), after installation gradually increase the temperature in increments of 5° to avoid overheating. Maximum operating temperature should never exceed 85°F (29.4°C). Use of an in-floor temperature sensor is recommended to avoid overheating. Contact the manufacturer of your radiant heating system for further recommendations.
-
Electric Radiant Floors: consist of electric cables (or) mats of electrically conductive materials mounted on the subfloor below the floor covering. Mesh systems are typically embedded in thin-set. When embedding the system components, use cementitious patching and leveling compounds that meet or exceed Shaw’s maximum moisture level and pH requirements. Use of gypsum-based patching and/or leveling compounds which contain Portland or high alumina cement and meet or exceed the compressive strength of 3,000 psi are acceptable.
-
Hydronic Radiant Floors: pump heated water from a boiler through tubing laid in a pattern under the flooring. Typically installed in channels under a wooden subfloor (or) imbedded in concrete slabs. Requires the installer follow a specific nailing pattern to avoid penetration of the heat system.
C. Existing Floor Coverings
-
Flooring can be installed over most existing hard surface floor coverings, provided that the existing floor surface is fully adhered, clean, flat, dry, structurally sound, and free of deflection.
-
Existing sheet vinyl floors should not be heavily cushioned and not exceed more than one layer in thickness. Soft underlayment and soft substrates will compromise the product's locking ability as well as diminish its indentation resistance.
-
Installation is NOT allowed over any type of carpet.
-
Do NOT install over wood floors adhered to concrete.
-
This product can be installed over existing ceramic/porcelain tile products with up to a ¼ inch 6mm) wide grout joint. If the grout joint width exceeds 1/4 inch (6.4 mm), a cementitious patching compound should be used to fill the grout joint to make it smooth with the surface of the tile.
RAISED ACCESS PANEL SUBFLOORS
-
Raised access panels must be stable, level, flat, free and clean of existing adhesives
-
24" x 24" (61cm x 61cm) panels are recommended.
-
Lippage (variation of height) between panels must not exceed 0.0295” (0.75 mm)
-
Gaps between panels must not exceed 0.039” (1mm)
-
There should be no deflection of the individual panels – Concave less than 0.0295” (0.75 mm)
-
Flatness 1/8” (3.2mm) in 10’ (3m)
-
Stagger the flooring tiles/planks to overlap the access panels
-
Telegraphing of access panel seams may be visible and is not considered a product defect nor warranted by the flooring manufacturer.
If needed overlay the panels with a 1⁄4” (6.4 mm) plywood and properly fasten to the access panels prior to the installation of the floorcovering. Prior to underlayment installation, repair any loose or unstable panels. Use the appropriate installation methods for the product.
III. Installation
Tools: Tape Measure, Utility Knife, Jigsaw, Tapping Block or Rubber Mallet, Pull Bar, ¼"(6.4mm) Spacers, T-Square, Safety Glasses, Broom or Vacuum and, if necessary, tools for subfloor repair.
Floating Installation: WPC flooring is designed to be installed utilizing the floating method. Proper expansion space 1/4” (6.4 mm) is required. Undercut all doorjambs. Do not fasten wall moldings and or transition strips to the planks.
Glue Down Installation: WPC products are approved for glue down installation over approved wood and concrete substrates. Follow adhesive label application instructions. Install flooring into wet adhesive to achieve a permanent bond. Maintain 1/4” (6.4 mm) perimeter expansion space. Refer to adhesive label for moisture limits of the adhesive. Roll flooring immediately after installation with a 100 lbs. 3‐section roller. Use of a premium resilient adhesive is recommended.
Flooring Adhesive
For LVT ranges (including Looselay LVT)
Hard set adhesives
ARDEX AF 130
ARDEX AF 2365
Pressure Sensitive adhesives
ARDEX AF 145 (mainly targeted for vertical applications)
ARDEX AF 148
ARDEX AF 962 (wet bond)
For LVT with cork backing
ARDEX AF 460
ARDEX AF 2575
UZIN PE 360 Primer
UZIN NC 159Leveling Compound
UZIN KE 2000 S Adhesive
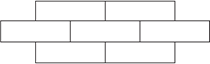
Tile patterns must be installed in a staggered (offset) brick pattern. Minimum 1/3 offset 1/2 offset is preferred.
LAYOUT

Step 1: Begin installation working from left to right. Insert spacers at ends and edges where planks meet wall.
|

Step 2: Lock short end of plank by inserting tongue into groove at an angle and drop in place. At the end of the row, measure and cut the flooring to complete the row. NOTE: to create a cut edge, use a straight edge and on the face of the flooring to score and nap the flooring. Install the cut edge closest to the wall.
|

Step 3: Use leftover plank from first row as starter for second row. There must be at least 20cm between plank end joints on adjacent rows. FOR TILE INSTALLATIONS: The distance between end joints should be equal to 30cm for proper appearance.
|

Step 4: Lock long edge of plank by inserting tongue into groove at an angle and drop in place. Slide plank toward end of previously installed plank until the tongue just touches the groove.
|

Step 5: IMPORTANT! Use hammer and tapping block to tap long edge of plank to ensure a tight fit. ANY GAPPING CAN COMPROMISE THE LOCKING SYSTEM!
|

Step 6: Attach a scrap piece of floor to bridge the gap between ends of planks.
|

Step 7: Tap end of plank with hammer and tapping block to lock ends of planks together. Remove bridge and continue towards wall until installing the final plank in the row. BE SURE TO TAP ON EDGE OF VINYL SO AS NOT TO DAMAGE LOCKING PROFILE.
|

Step 8: Use hammer and pull bar to lock final piece in row. Insert spacer at end of row. Continue installation to final row.
|

Step 9: Use hammer and pull bar to lock long edges of planks on final row.
|
|
Installing underneath door jambs:
|

Step 1: Undercut space under door jamb to allow plank to slide freely. Tap long edge with hammer and tapping block to lock long edge.
|

Step 2: Use hammer and pull bar to lock short end of plank.
|
COMPLETION
-
Protect all exposed edges of the flooring by installing wall molding and/or transition strips. Make sure that no plank will be secured in any way to the subfloor.
-
For wet areas such as bathrooms caulk the perimeter of the floor with a flexible silicone caulk.
-
Protect the finished flooring from exposure to direct sunlight to reduce fading and thermal expansion.
-
Cutting resilient product into a fine point may lead to delamination. Use an ethyl cyanoacrylate based glue to help fuse the resilient point together. Be sure to clean all glue from the top surface immediately. Alcohol based glues may cause resilient products to swell.
-
Adhering tape to the surface of your resilient flooring could damage the surface.
Do not use tape to secure floor protection directly to the floor during construction or renovation. Instead, adhere tape to the material used to protect the floor and secure it to the base molding along the wall. A material such as ram board can also be used to protect your flooring.
WPC弹性地板安装指南
I. 总则
为保证良好的安装效果,地板铺装应遵循以下安装说明和建议。
· 安装前对材料可以不进行环境预适应,地板安装环境温度应介于55~85华氏度(13~29摄氏度)或室内平均温度为70华氏度(21.1摄氏度)。
· 安装后地板的使用环境温度为55~100华氏度(13~37.7摄氏度)
· 避免长时间阳光直射,否则可能导致地板变色。在日照高峰期,建议使用窗帘或百叶窗。阳光直射造成的高温将导致热膨胀和油漆褪色。
· 在所有其他装修工序已经完成后,再安装地板。否则可能造成地板损坏。
· 如需将橱柜安装在地板上方(包括岛柜),这个区域必须进行满胶铺装,满胶铺装的区域也包括橱柜和岛柜区域之外的60厘米区域)。
· 为减少色差,应取用不同纸箱里的地板进行混合安装。
· 安装前检查所有地板是否受损。如果您对产品的匹配度或表面油漆效果存有任何疑问,请与萧氏联系。对于已切割或已安装的地板的匹配度和油漆效果投诉,将不予受理。
· 使用符合或优于最大湿度和酸碱度要求的水泥修补材料和找平材料。可以接受使用含有硅酸盐的水泥材料或高铝水泥,且基层抗压强度不低于20MP。
· 当地基开裂或切口深度大于25.4mm,应使用双组分的氨酸甲酸酯进行修复,否则水分可能从地下渗入到地面, 导致水分击穿胶水或修补材料。
· 安装方法:悬浮安装/粘胶安装(适用于地下室,一楼地面或一楼以上的地面安装)。
· 悬浮安装或粘胶安装所需的四周伸缩缝如下:
小于232平方米的区域使用6.4毫米的伸缩缝
大于232平方米的区域使用12.7毫米的伸缩缝
· 本款地板为防水地板,地板四边防水。但是如果基层地面湿度过高,会产生霉菌、霉变和其他与湿度相关的问题。例如,地板下的潮气可能导致不健康的室内环境。
· 可采用15丝厚的PE膜(水蒸气透过率小于等于1)或等效的防潮涂层作为地面附加保护层。
· 再生橡胶垫层不可作为弹性塑胶地板的垫层,因其化学的不兼容性可能会导致产品性能问题。
II. 基层地面信息
基层地面须干净、平整、干燥且结构坚固。符合要求的基层地面是实现成功安装的最重要的一步。基层地面必须平整——3米靠尺平整度误差不超过4.7mm或1.8米靠尺水平差不超过3.2mm
A. 木质基层
直铺在水泥地面上的木基层不适合铺装弹性地板。有关基层建议要求,请参考ASTM F1482建议。
1. 请勿在木质基层上铺设塑料膜;
2. 地下室和爬行空间地面须保持干燥。爬行空间地面需用15丝的黑色PE膜全面覆盖。从地面下的龙骨到爬行空间的地面间隙不小于457毫米,四周通风孔的间距应等于爬行空间总平方英尺的1.5%,以提供交叉通风。如与地方法规相矛盾,以当地法规为准。
3. 不允许将地板直接安装在龙骨上;直铺在水泥地面上的基层也不适合铺装弹性地板。
4. 所有其他基层——胶合板、欧松板、颗粒板、刨花板、华夫板等,结构必须坚固,且必须按照制造商的建议进行安装。当地建筑规范可能仅规定地板系统的最低要求,可能无法为合理安装地板提供足够刚性和支撑。如有需要,可以额外增加一层APA垫层,根据基层制造商的建议进行紧固和固定。
5. 不建议将弹性地板直接安装在阻燃或防腐胶合板上。应额外安装一层6.4毫米厚的APA垫层。
B. 混凝土基层
新浇筑以及原有的混凝土基层地面应符合最新的ACI302和ASTMF710 标准,即铺装弹性地板的地面基层规范要求。如需获取最新的该规范,请联系美国材料与测试协会,地址:100 BARR HARBOR DRIVE,WEST CONSHOHOCKEN,PA 19428;610 - 832 - 9585;网址: HTTP://WWW.ASTM.ORG.
1. 地面应光滑、永久干燥、洁净,无灰尘、蜡、溶剂、油漆、脂、油和旧粘合剂残留物等所有异物。地面必须坚硬致密,无粉末或剥落。
2. 如胶水残余为沥青基,或其他类型的胶水残留物,必须使用行业认可的方法进行清除,如机械清除法,湿刮法。
3. 如使用化学清除剂,应清除化学剂残余;使用双组份聚氨酯涂层进行地面处理,防止地下潮气击穿胶水或修补材料。
4. 不推荐使用溶剂除胶或柑橘除胶剂法,因为残留在地面的溶剂可能对胶水以及地板性能产生影响。
警告:切勿砂打、干扫、干刮、钻、锯、喷砂、机械切削或粉碎现有的弹性地板、背衬、衬毡、沥青基粘合剂或其他粘合剂。
l 这些产品可能含有石棉纤维和/或石英,避免产生灰尘。吸入这种灰尘会引起癌症和呼吸道疾病。人体吸入石棉纤维会增加身体受到伤害的风险。除非能确保产品不含石棉材料,否则您就认为它含有石棉材料。法规可能要求对材料进行测试以确定石棉含量,并可能对材料的移除和处置作出规定。有关拆除原有弹性地材的详细信息和说明,请参阅弹性地材协会(RFCI)出版的《拆除弹性地材的工作规范》的最新版本。欲知当前信息,请访问www.rfci.com。
l 水泥地面必须干燥,无可见湿气。
l 湿度测试-根据ASTM 1869氯化钙测试标准,最大湿度为8磅(3.63千克);以及根据ASTM2170相对湿度要求在每1000平方英尺24小时的相对湿度为90%。
l 请勿安装在曾经有过高湿度或静水条件情况的混凝土上。如果底层地板中湿度过高,会产生霉菌、霉变和其他与湿度相关的问题。例如,地板下的潮气会导致不健康的室内环境。Shaw Industries概不保证也不负责因湿度相关问题造成的地板损坏。
l 混凝土的pH值应介于7 - 10之间。
l 确定混凝土地面的干燥程度是否满足安装地板条件,这一最终责任由地板安装人员负责。
注:地板安装人员可能无责任进行这些测试。但地板安装人员有责任确保:在安装地板之前已经进行这些测试,且测试结果满足安装地板条件。含水率测试结果仅表示测试时的地面条件。
C.轻质混凝土
所有关于弹性地板下轻质混凝土的适用性和性能的建议及保证,由轻质混凝土制造商负责。轻质混凝土的配方人员需要得到制造商的授权或相关资质。确保施工现场的混凝土配比正确和泵送设备正常运行至关重要。为确保配比正确,建议进行塌落度测试。
· 弹性地板下方可采用干密度大于1440千克/立方米的轻骨料混凝土。
· 承载较大静荷载和/或动荷载的混凝土地面应要求具有更高强度和密度,以支撑此类荷载。
· 表面必须永久干燥、清洁、光滑、无灰尘,且结构坚固。
· 进行胶合测试,以确定粘合剂与地面的兼容性。可以使用地面底涂界以提高胶合强度。
· 对于面积不超过92.9平米的区域,应进行三次内部相对湿度测试。每增加92.9平米,应增加一次额外测试。
地暖: 地暖的基层可以是混凝土、木基层或两者结合而成的系统。
系统加热组件必须与地板产品至少有12.7毫米的间隔。安装前,系统必须开启并运行至少两周,以减少残留水分。安装前三天将温度降低至18.3℃,安装后以2.8℃为增量,逐渐升高温度,避免加温过热。最高工作温度不得超过29.4℃,建议使用地热温度传感器以防止加温过热。请联系您的地暖制造商以获得进一步的建议。
l 电加热地面:由安装在地板下方的基层地面中的电缆(或)电片组成。导电材料嵌入在基层中。网格通常嵌入水泥中。当系统组件安装时,应使用满足或优于Shaw最大湿度和酸碱度要求的水泥修补材料和找平材料。可以接受使用含有硅酸盐水泥或高铝水泥,且抗压强度至少为20MPA。
l 水加热地暖:地板下面的水经过锅炉加热,通过铺设的管道进行泵送。通常管道木基层下方或者嵌入水泥基层中。要求安装师傅遵循打钉的具体图纸要求,避免打穿地热管道系统。
D. 原有的地板材料地面
l 只要原有的地材表面完全粘附于清洁、平整、干燥、结构坚固且无偏斜的地面上,现有硬质地材产品上可直接安装地板,
l 原先的弹性卷材地板不应有很厚的衬垫,衬垫厚度不应超过一层。软背垫和软基层会损害产品的锁扣性能,并降低其抗压性能
l 不允许安装在任何类型的地毯上。
l 请勿安装在胶粘在混凝土上的木地板上。
l 该产品可安装在现有的瓷砖产品上,瓷砖勾缝可达到6毫米。如果瓷砖勾缝宽度超过6.4毫米,则应使用水泥修补材料填充勾缝,使之与瓷砖表面齐平。
E. 高架地板基层地面
l 高架地板必须稳定、平整、水平、干净不含任何残余粘合剂等。
l 建议使用610毫米x610毫米高架地板。
l 高架地板之间的高度差不得超过0.0295英寸(0.75 毫米)
l 高架地板之间的间隙不得超过0.039英寸(1 毫米)
l 高架地板不应有变形–凹面小于0.0295英寸(0.75 毫米)
l 平整度差异3.2毫米/3米
l 地板拼缝与高架地板拼缝错开
l 高架地板接缝可能导致弹性地板浮印,此现象不视为产品缺陷,地板制造商不予保修。
如有需要,在安装地板材料前,用1⁄4英寸(6.4毫米)胶合板安装在高架地板上。安装垫层之前,对所有松动或晃动的高架地板进行修复。使用合适的安装方法对高架地板进行固定。
III. 安装
工具:卷尺, 美工刀, 曲线锯, 敲击块或橡皮锤, 回力钩, 6.4mm伸缩缝垫片, 丁字尺, 护目镜, 扫帚或吸尘器。必要时需要使用基层修复工具。
悬浮安装
WPC地板采用免胶安装设计, 需要预留1/4英寸(6.4毫米)的伸缩缝。对所有门框底部进行切割。请勿将踢脚线和/或压边条与地板进行固定。
粘胶安装:WPC产品能够以粘胶方式安装在木材和混凝土基层上。遵循胶水标签上的使用说明。将地板进行湿胶安装,以实现永久粘合。预留1/4英寸(6.4毫米)的伸缩缝。有关粘合剂的湿度限制,请参考粘合剂标签。安装后立即使用重45千克的3节辊筒滚压地板。推荐使用优质的弹性地板胶。
地板胶
LVT 的地板胶水(含Looselay的地板胶水)
固化胶
ARDEX AF 130
ARDEX AF 2365
压敏胶
ARDEX AF 145 (主要是垂直方向的使用)
ARDEX AF 148
ARDEX AF 962 (湿胶粘贴)
LVT软木垫产品用胶
ARDEX AF 460
ARDEX AF 2575
UZIN PE 360 底涂
UZIN NC 159自流平材料
UZIN KE 2000 S 胶水
方块地板铺装图案必须采用错位(偏移)砖型图案。至少1/3偏移,首选1/2偏移。
步骤1:安装从左到右开始。在地板与墙壁接触的末端和边缘处添加伸缩缝垫片。
|
步骤2:以一定角度将短边榫舌插入凹槽中,使其完全吻合,从而锁定地板的端头。继续安装地板直至第一排末端。
|
步骤3:将第一排的剩余地板短料用作第二排的起始地板。相邻排的地板接缝之间至少相隔20厘米。就方形地板铺设而言:接缝之间的间距距离应等于30 厘米,以获得完美的外观效果。
|
步骤4:以一定角度将长边榫舌插入凹槽中,然后压下使其完全吻合,从而锁定地板的长端方向。将地板侧滑至先前安装好的地板末端,按下使其公母槽咬合。
|
步骤5:非常重要!使用锤子和敲击块敲击地板的长边,以确保咬合到位。任何拼装间隙均会有损锁扣系统性能!
|
步骤6:用一小块废地板(桥接板)固定地板末端的连接。
|
步骤7:用锤子和敲击块敲击地板末端将地板末端咬合在一起。拆下桥接板,继续向前铺装,直至安装好最后一块地板。敲击时请击打弹性地板的边缘,以免损坏锁扣系统。
|
步骤8:用锤子和回力钩将最后一块地板安装到位,在地板末端插入伸缩缝垫片。继续安装直至最后一排安装完成。
|
步骤9:用锤子和回力钩安装最后一排地板使其与前排地板完全咬合。
|
|
门套下方的地板安装
|
步骤1:在门框下方进行底切,使地板能够在门框下方自由滑动。用锤子和敲击块敲击长边使其锁扣完全咬合。
|
步骤2:用锤子和回力钩敲拉地板短端使其锁扣完全咬合。
|
收尾
1. 安装踢脚线或压条,以保护地板的外露边缘。踢脚线或压条不得固定在基层地面上。
2. 浴室等潮湿区域,用弹性硅胶密封地板的四周。
3. 对已完工的地板进行保护,使其免受阳光直射,避免褪色和热膨胀。
4. 弹性地板的切割可能会导致地板分层开胶。使用氰基丙烯酸乙酯基粘合剂将开胶点胶合在一起。注意立即清除地板表面上所有的粘合剂。 酒精基粘合剂可能会导致弹性地板膨胀。
5. 在弹性地板上粘贴胶带可能会损坏其表面,所以在翻新或装修过程中不要直接把胶带粘在地板上进行地面保护。可将胶带贴在踢脚线上进行地板保护材料的固定,您也可以选用纸板等保护材料进行地板保护。