Herringbone
The herringbone design is a complex yet simple design that requires some advanced layout to help ensure a successful installation. The key to a successful installation are the steps leading to the installation. Preparation of the subfloor is critical and must be very flat. The layout of the room, focal point for the pattern, and direction to run the pattern are all key to the installation and overall look.
Note: 10 - 15% material overage is needed for this design method.
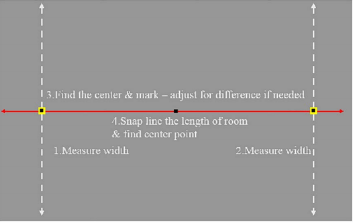
To begin with- Establish a primary line:

Establish the secondardy line:
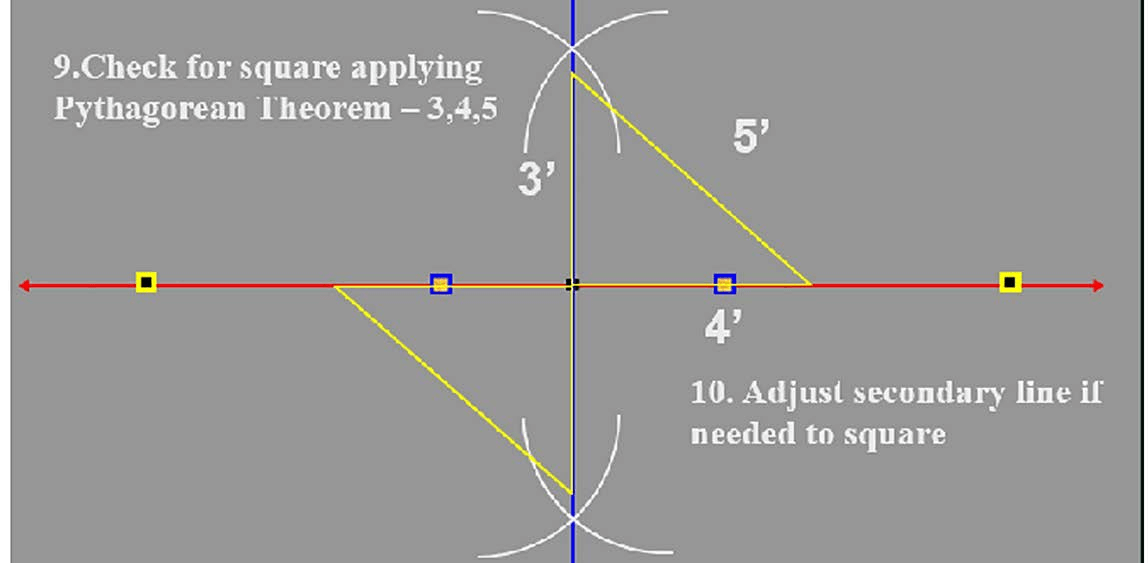
Once you have established the primary and secondary line, check for square - use the 3'.4',5' method otherwise known as Pythagorean Theorem. For larger areas, you can use 6',8', 1 O' and so on.

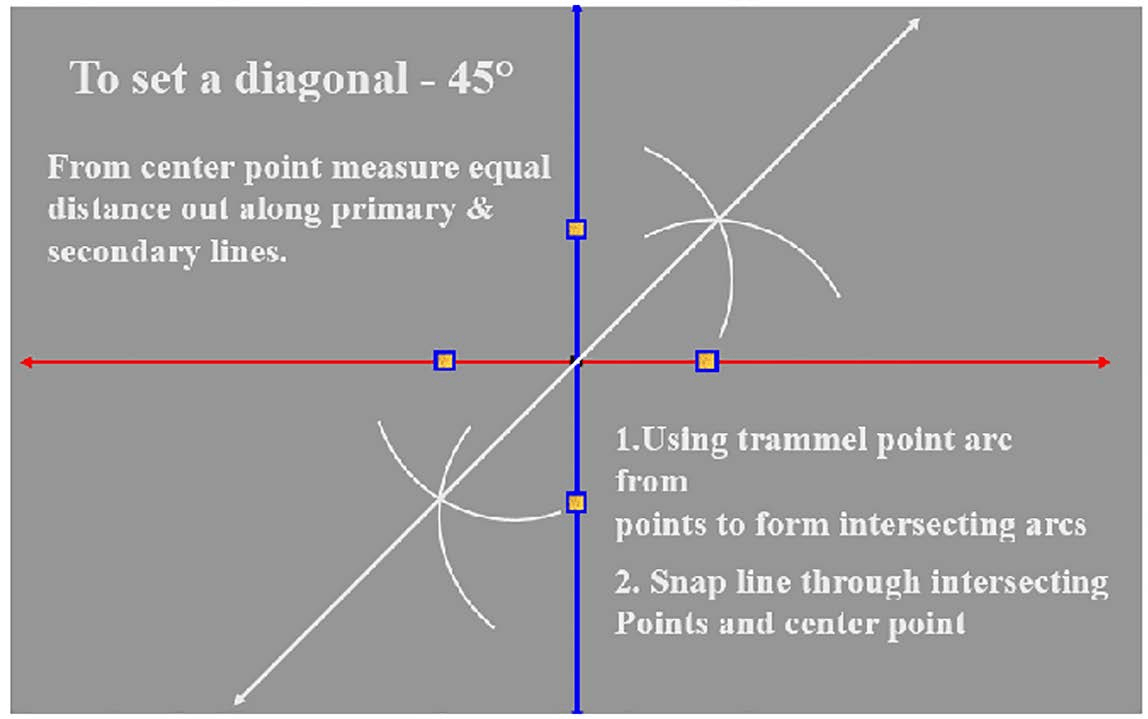
To set diagonals - first line - 45 degrees

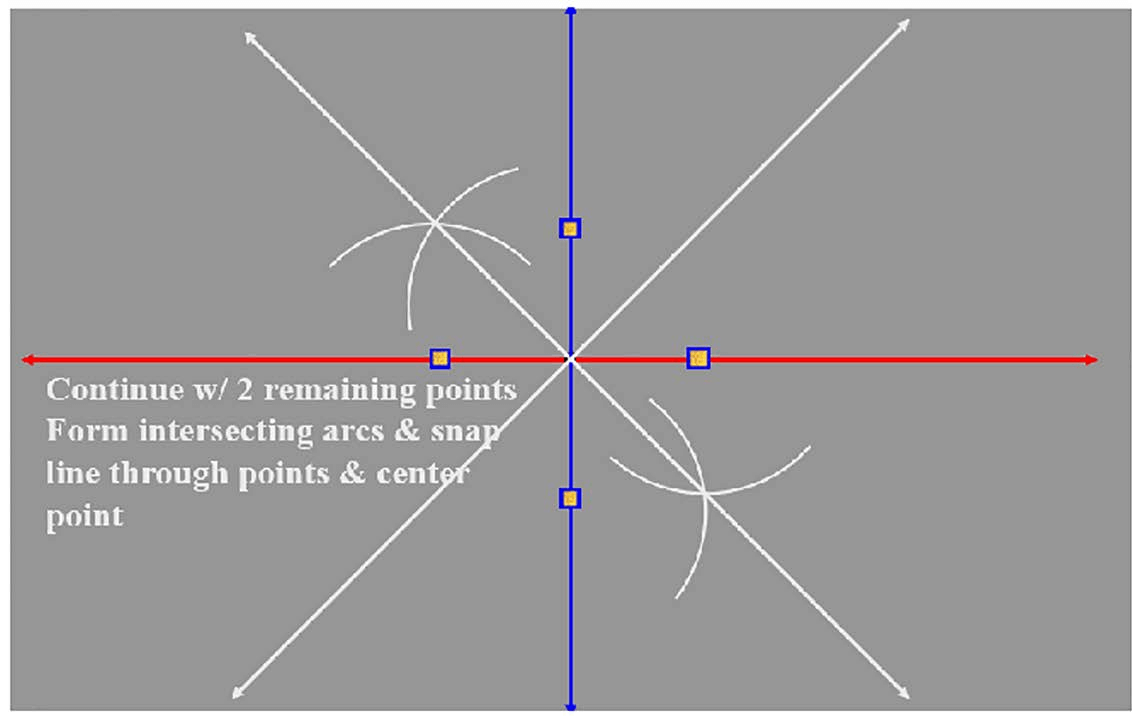
Second diagonal - 45 degrees

Once all the lines are established, the pattern can be laid from the primary lines or use the diagonal lines to install on a 45 degree angle. After you have determined the direction to install the pattern, you will need to lay out 4 planks and establish reference lines (secondary) to keep the pattern from running off.
Prior to installation, always refer to the installation guidelines of the product for complete installation details.
Continue to install the pattern until you reach the far wall. Alignment is critical - if needed, use a framing square to check alignment. Once you have reached the farthest wall, work the pattern to the right, one row at a time and repeat. Then work the left side of the room until you reach the wall. Then repeat to fill the remaining quadrants.
Instructional Video Link

Establish the secondardy line:

|
Non-Divisible Installation
|
Divisible Installation
|
|
Non-Divisible products have a width that does not evenly divide into their length. With having non-divisible products installed in herringbone there is a potential for a visible pattern shift across the installation.
|
Divisible products have a width that divide evenly into their length, therefore the herringbone visual remains consistent throughout the installation. Above shows an example of a 6" wide x 48" long divisible product.
|
Note that only direct glue products are approved for herringbone installation, products with clicking mechanisms are not approved.